
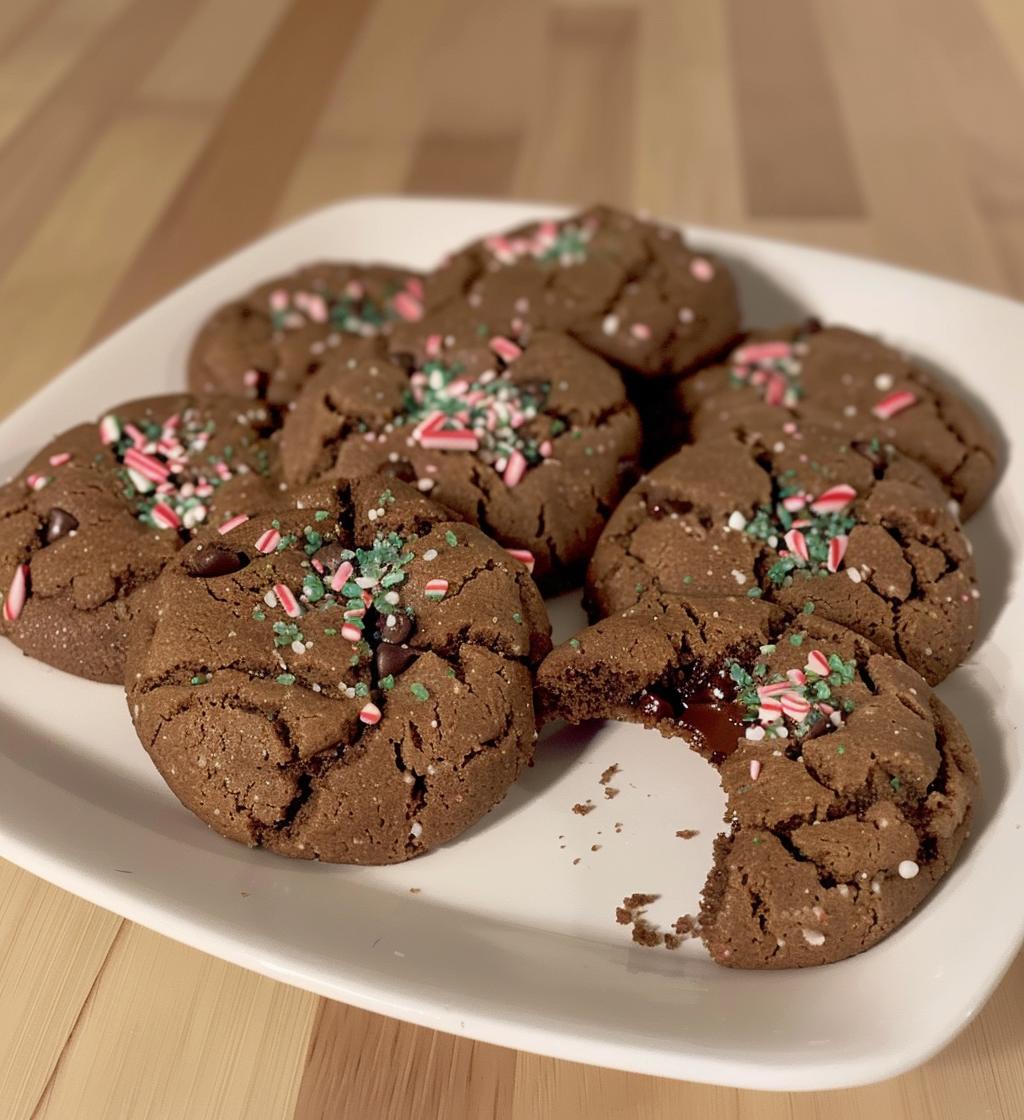
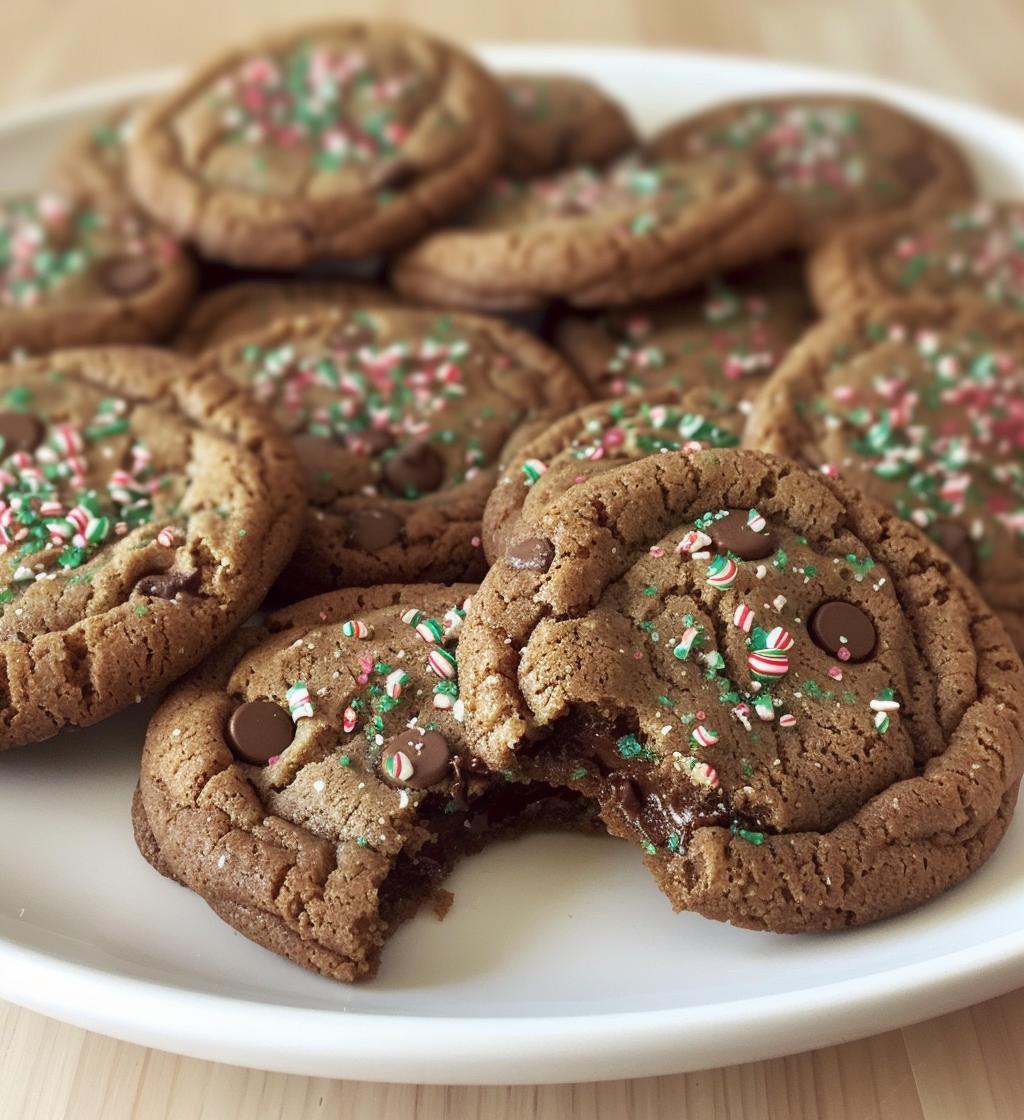
There’s just something magical about the smell of peppermint cookies baking in the oven during the holiday season! I can still remember the joy of decorating these delightful treats with my family, their vibrant red and white swirls making our kitchen feel so festive. Every bite of these soft, chewy cookies bursts with the cool, refreshing taste of peppermint, and they’re just perfect for sharing at holiday gatherings or cozy nights by the fire. Trust me, once you experience the combination of rich chocolate and that minty kick, you’ll be hooked! So, let’s get ready to whip up the *best* peppermint cookies that will fill your home with warmth and holiday cheer!
Ingredients List
- 2 cups all-purpose flour
- 1/2 cup unsweetened cocoa powder
- 1 teaspoon baking soda
- 1/2 teaspoon salt
- 1 cup unsalted butter, softened to room temperature
- 1 cup granulated sugar
- 1/2 cup packed brown sugar
- 1 large egg
- 1 teaspoon vanilla extract
- 1 teaspoon peppermint extract
- 1 cup semi-sweet chocolate chips
- 1/2 cup crushed peppermint candies
How to Prepare Peppermint Cookies
Prepping the Oven and Ingredients
First things first, let’s get that oven preheating to 350°F (175°C). While it warms up, gather all your ingredients—trust me, it makes the whole process smoother! Make sure your butter is softened to room temperature; this helps it cream perfectly with the sugars. Oh, and don’t forget to line your baking sheets with parchment paper for easy cleanup!
Mixing the Dry Ingredients
In a medium bowl, whisk together the flour, cocoa powder, baking soda, and salt. This step is crucial! You want to ensure everything is evenly combined to avoid any clumps of cocoa later. I like to use a whisk for this—it really helps aerate the mixture and makes for lighter cookies. Set this bowl aside for now; we’ll come back to it soon!
Creaming the Butters and Sugars
In a separate large bowl, cream together the softened butter, granulated sugar, and brown sugar until it’s light and fluffy. This should take about 2-3 minutes with a hand mixer or stand mixer. The texture is key here—a smooth mixture will help your cookies be tender and delicious. Don’t rush this step; it’s worth it for that perfect cookie base!
Combining Wet and Dry Mixtures
Now, it’s time to add the egg, vanilla extract, and peppermint extract to the creamed butter and sugars. Mix well until everything is combined. Gradually add in your dry ingredients, stirring gently until just combined. You don’t want to overmix here, or your cookies may turn out tough. It should look a bit crumbly but come together nicely!
Incorporating Chocolate Chips and Peppermint
Fold in the chocolate chips and crushed peppermint candies with a spatula, being careful not to overwork the dough. This part is so much fun—just imagine those sweet chocolate morsels and crunchy mint pieces all melting together in your cookies! It’s a festive explosion of flavor waiting to happen!
Baking the Cookies
Using a tablespoon, drop rounded balls of dough onto your prepared baking sheets, leaving some space between each one (they’ll spread a bit). Bake them for 10-12 minutes, or until the edges are firm but the centers still look a little soft. That’s the sweet spot for chewy cookies! Your kitchen will smell heavenly during this time!
Cooling and Storing
Once baked, let the cookies cool on the baking sheet for about 5 minutes before transferring them to a wire rack to cool completely. This helps them firm up a bit! If you’re storing them, make sure they’re completely cool before placing them in an airtight container. They’ll stay fresh for up to a week, but trust me, they won’t last that long!
Nutritional Information
Here’s the estimated nutritional breakdown per peppermint cookie, so you can indulge a little guilt-free! Remember, these values are approximations, and they can vary based on specific ingredients used.
- Calories: 150
- Fat: 7g
- Saturated Fat: 4g
- Unsaturated Fat: 2g
- Trans Fat: 0g
- Cholesterol: 15mg
- Sodium: 50mg
- Carbohydrates: 20g
- Fiber: 1g
- Sugar: 10g
- Protein: 2g
So go ahead, enjoy these festive cookies, and remember that a little sweetness never hurt anyone! Just keep an eye on the number of cookies you munch on—it’s easy to lose track when they’re this delicious!
FAQ Section
Can I use different extracts instead of peppermint?
Absolutely! While peppermint is a classic, you can try using vanilla or almond extract for a unique twist. Just keep in mind that the flavor profile will change, but it could be delicious in its own right!
What can I do if my cookie dough is too sticky?
If your dough feels too sticky, don’t panic! Just add a little more flour, about a tablespoon at a time, until it reaches a more manageable consistency. This can happen if the butter was too warm or if the kitchen is particularly humid.
Can I make these cookies ahead of time?
Definitely! You can prepare the dough and refrigerate it for up to 3 days before baking. Just make sure to wrap it tightly in plastic wrap so it doesn’t dry out. You can even freeze the dough for up to 3 months—just thaw it in the fridge overnight before baking!
What’s the best way to crush peppermint candies?
I like to place the candies in a zip-top bag and gently crush them with a rolling pin or a heavy pan. This keeps the mess down and you can control the size of the pieces. Just be careful not to smash them too finely; you want some nice crunchy bits in your cookies!
How should I store leftover peppermint cookies?
Store your peppermint cookies in an airtight container at room temperature for up to a week. If you want to keep them fresh longer, you can freeze them! Just layer them between parchment paper and seal them in a freezer bag. They’ll be ready to enjoy whenever you want a sweet treat!
Why You’ll Love This Recipe
- Quick and easy to prepare, perfect for busy holiday schedules.
- Deliciously rich chocolate combined with refreshing peppermint for a festive treat.
- Soft, chewy texture that melts in your mouth—guaranteed to be a crowd-pleaser!
- Perfect for cookie exchanges, holiday parties, or cozy nights at home.
- Customizable with various mix-ins or toppings to suit your taste.
Tips for Success
To make the *best* peppermint cookies, here are a few tips to keep in mind! First, always measure your flour accurately—too much can lead to dry cookies, so spoon it into your measuring cup and level it off with a knife. Next, don’t skip the creaming step; it’s crucial for achieving that light and fluffy texture. If you want an extra burst of peppermint flavor, feel free to add a few more crushed candies on top before baking. And remember, every oven is different, so keep an eye on those cookies as they bake to avoid overcooking. Enjoy the process, and happy baking!
Variations
If you’re feeling adventurous, there are plenty of fun ways to mix up these peppermint cookies! For a festive twist, try adding a tablespoon of crushed gingerbread cookies into the dough for a delightful spiced flavor. You can also swap out the chocolate chips for white chocolate chips for a sweet contrast to the peppermint. Another idea is to drizzle melted chocolate over the cooled cookies for an extra touch of decadence. And if you want to get really creative, consider adding a sprinkle of sea salt on top before baking—it’s a perfect blend of sweet and salty that’ll leave your taste buds dancing!
Serving Suggestions
These peppermint cookies are absolutely delightful on their own, but pairing them with the right beverages can elevate the experience even more! I love serving them alongside a steaming cup of hot cocoa topped with fluffy marshmallows—it’s like a cozy hug in a mug! You could also try them with a warm cup of spiced chai or even a classic peppermint tea for that extra minty kick. For a fun twist, serve them with scoops of vanilla ice cream; the creamy texture contrasts beautifully with the chewy cookies. You really can’t go wrong—enjoy experimenting with your favorite pairings!
Storage & Reheating Instructions
To keep your peppermint cookies fresh and delicious, store them in an airtight container at room temperature for up to a week. If you want to extend their life, you can freeze them! Just layer the cookies between sheets of parchment paper in a freezer-safe bag, and they’ll stay good for up to 3 months. When you’re ready to enjoy them, simply let them thaw at room temperature. If you prefer them warm, pop them in the microwave for about 10-15 seconds. Just be careful not to overheat them; nobody wants a rubbery cookie!
Print
Peppermint Cookies That Will Melt Your Heart and Soul
- Prep Time: 20 minutes
- Cook Time: 12 minutes
- Total Time: 32 minutes
- Yield: 24 cookies 1x
- Category: Dessert
- Method: Baking
- Cuisine: American
- Diet: Vegetarian
Description
Delicious peppermint cookies perfect for the holiday season.
Ingredients
- 2 cups all-purpose flour
- 1/2 cup unsweetened cocoa powder
- 1 teaspoon baking soda
- 1/2 teaspoon salt
- 1 cup unsalted butter, softened
- 1 cup granulated sugar
- 1/2 cup brown sugar
- 1 large egg
- 1 teaspoon vanilla extract
- 1 teaspoon peppermint extract
- 1 cup chocolate chips
- 1/2 cup crushed peppermint candies
Instructions
- Preheat the oven to 350°F (175°C).
- In a bowl, whisk together flour, cocoa powder, baking soda, and salt.
- In another bowl, cream together butter, granulated sugar, and brown sugar until smooth.
- Add the egg, vanilla extract, and peppermint extract; mix well.
- Gradually add the dry ingredients to the wet ingredients.
- Fold in chocolate chips and crushed peppermint candies.
- Drop tablespoon-sized balls of dough onto a baking sheet.
- Bake for 10-12 minutes or until edges are firm.
- Let cool on the baking sheet for a few minutes before transferring to a wire rack.
Notes
- Store cookies in an airtight container.
- For a stronger peppermint flavor, add more peppermint extract.
- These cookies can be frozen for up to 3 months.
Nutrition
- Serving Size: 1 cookie
- Calories: 150
- Sugar: 10g
- Sodium: 50mg
- Fat: 7g
- Saturated Fat: 4g
- Unsaturated Fat: 2g
- Trans Fat: 0g
- Carbohydrates: 20g
- Fiber: 1g
- Protein: 2g
- Cholesterol: 15mg
Keywords: Peppermint cookies, holiday cookies, dessert