
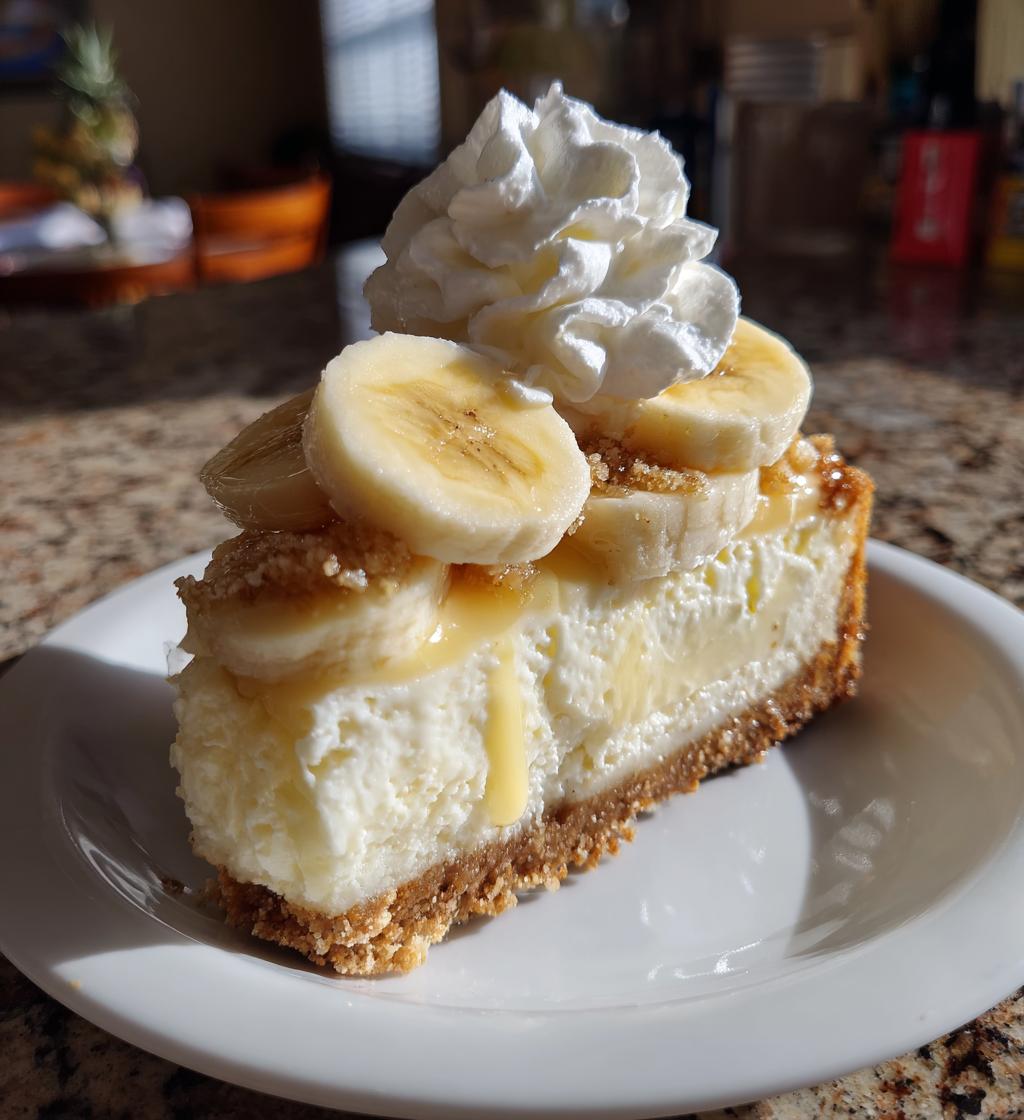
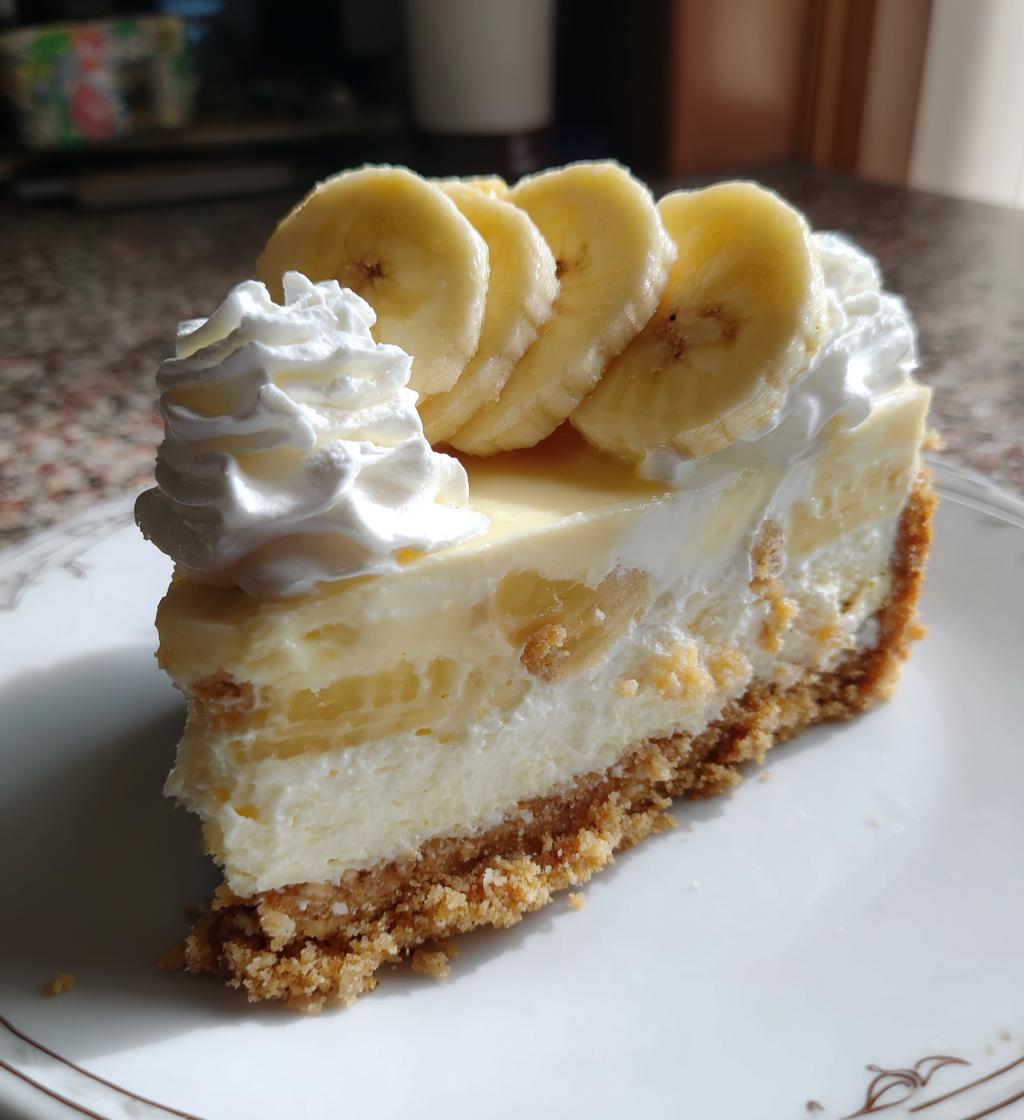
Oh, banana pudding! It’s a classic that always takes me back to my grandma’s kitchen, where the sweet scent of ripe bananas and creamy pudding filled the air. I can still see her gently folding whipped cream into the mixture, creating that dreamy texture we all love. Now imagine taking that nostalgic flavor and transforming it into a luscious Banana Pudding Cheesecake! This dessert combines the best of both worlds—rich, velvety cheesecake meets the light, comforting banana pudding we can’t get enough of. It’s the perfect way to impress guests while also giving a nod to those cherished family recipes. Trust me, every bite will transport you back to those sunny afternoons spent with loved ones, all while indulging in something truly special!
Ingredients List
Gather these simple ingredients to create your delicious Banana Pudding Cheesecake:
- 1 1/2 cups graham cracker crumbs
- 1/2 cup unsalted butter, melted
- 2 (8 oz) packages cream cheese, softened
- 1 cup sugar
- 1 tsp vanilla extract
- 2 cups heavy whipping cream
- 1 package instant banana pudding mix
- 2 cups milk
- 3 ripe bananas, sliced
Make sure to use ripe bananas—they bring out the sweetness and flavor that really elevate this dessert! You’ll love how these ingredients come together to create that creamy, dreamy cheesecake goodness everyone will be raving about.
How to Prepare Instructions
Preheat the Oven
First things first, let’s get that oven preheated to 325°F (165°C). Preheating is crucial because it ensures your crust bakes evenly and holds its shape perfectly. If you skip this step, you might end up with a soggy crust, and nobody wants that! So, while we’re getting everything ready, just let your oven do its thing and warm up to that perfect temperature.
Prepare the Crust
Now, for the crust! In a mixing bowl, combine 1 1/2 cups of graham cracker crumbs with 1/2 cup of melted unsalted butter. Just mix it up until it looks like wet sand. You want it to hold together when pressed. Grab your springform pan and firmly press this mixture into the bottom. I like to use the bottom of a measuring cup for even pressure. Pop it in the oven for about 10 minutes. This little bake time will help set the crust and give it that lovely golden color. Ooh, the smell is heavenly! Once it’s done, let it cool completely so it’s ready to hold all that creamy goodness we’re about to create.
Make the Cheesecake Filling
Okay, on to the filling! In a large bowl, beat together 2 packages of softened cream cheese, 1 cup of sugar, and 1 teaspoon of vanilla extract until it’s super smooth and creamy. This part is so satisfying! Now, in a separate bowl, whisk together 1 package of instant banana pudding mix with 2 cups of milk until it thickens up nicely. Once that’s ready, gently fold this pudding mixture into the cream cheese mixture. Be careful here; you want it to stay light and fluffy! Next, whip 2 cups of heavy whipping cream in a different bowl until stiff peaks form. This means it should hold its shape when you lift the beaters. Then, fold that whipped cream into the banana mixture, creating a light and airy filling. Wow, look at that texture!
Assemble the Cheesecake
Now comes the fun part—assembly! Start by layering your sliced bananas over the cooled crust. I like to use about 3 ripe bananas, but feel free to add more if you love that banana flavor! Pour the creamy cheesecake mixture over the bananas, spreading it evenly. It’s already looking like a masterpiece! Now, here’s the hard part: you need to chill this in the refrigerator for at least 4 hours, but if you can wait overnight, trust me, it’s worth it. The flavors meld together beautifully, and the texture becomes absolutely divine. Just imagine slicing into that chilled cheesecake—pure bliss!
FAQ Section
Can I use fresh bananas instead of pudding?
Absolutely, you can use fresh bananas for a more natural flavor! Just keep in mind that they’ll give a different texture and moisture level compared to the pudding mix. The pudding mix helps create that creamy consistency while fresh bananas will add chunks, which can be delightful too! If you go this route, I recommend layering the bananas on top of the cheesecake filling instead of mixing them in, so they stay fresh and don’t turn brown too quickly.
How long does this cheesecake last?
This Banana Pudding Cheesecake will last in the refrigerator for about 4 to 5 days. Just make sure to cover it well with plastic wrap or store it in an airtight container to keep it fresh and delicious! If you notice any browning on the bananas, you can always add a bit more whipped cream on top to mask it. But trust me, it won’t last long—everyone will be coming back for seconds!
Can I make this dessert ahead of time?
You bet! This cheesecake is perfect for making ahead. In fact, I highly recommend chilling it overnight for the best flavor and texture. Just prepare it as instructed, cover it tightly with plastic wrap, and pop it in the fridge. This way, when it’s time to serve, you’ll have a show-stopping dessert ready to wow your guests without any last-minute stress. Just remember to add any toppings right before serving for the freshest taste!
Why You’ll Love This Recipe
This Banana Pudding Cheesecake is truly a showstopper, and here’s why you’re going to adore it:
- Quick and easy preparation: With just a few straightforward steps, you can whip up this delicious dessert without any fuss. Perfect for both novice and experienced bakers!
- Combines favorite flavors: It’s the ultimate mashup of two beloved treats—banana pudding and cheesecake—resulting in a flavor explosion that everyone will love!
- Perfect for gatherings: Whether it’s a family barbecue or a holiday feast, this cheesecake is a crowd-pleaser that’ll have your guests raving!
- Creamy texture and delicious taste: Each slice is a delightful blend of creamy cheesecake and fluffy banana goodness, making it an irresistible treat that melts in your mouth.
Trust me, once you serve this up, it’s going to become a staple in your dessert rotation! Enjoy every creamy, dreamy bite!
Tips for Success
To make sure your Banana Pudding Cheesecake turns out perfectly every time, I’ve got some tried-and-true tips that will help you avoid common pitfalls and elevate your dessert game!
- Use room temperature ingredients: Make sure your cream cheese is softened and at room temperature before mixing. This helps create a smooth filling without lumps. Trust me, it makes all the difference!
- Don’t skip the chilling: I know it’s tempting to dig in right away, but chilling the cheesecake for at least 4 hours (or overnight, if you can wait) is crucial. It allows the flavors to meld beautifully and the texture to firm up.
- Be gentle when folding: When you fold the whipped cream into the banana mixture, do it gently! You want to keep that light, airy texture. Over-mixing can deflate the filling, making it less fluffy.
- Layer wisely: For the best banana flavor, slice your bananas and layer them on the bottom of the crust. This way, they’re perfectly nestled in that creamy filling without getting mushy. Plus, it looks gorgeous when you slice it!
- Store properly: If you have leftovers (though I doubt you will!), cover your cheesecake tightly with plastic wrap or store it in an airtight container in the fridge. This keeps it fresh and prevents it from absorbing any odors from the fridge.
- Adjust sweetness if needed: If you like your desserts a bit sweeter, feel free to adjust the sugar in the cream cheese mixture to your taste. Just remember that the bananas also add natural sweetness!
With these tips in your back pocket, you’re all set for cheesecake success! Enjoy the process and the delightful outcome—you’re going to love every creamy, dreamy bite of this dessert!
Storage & Reheating Instructions
Storing your Banana Pudding Cheesecake properly is key to keeping it fresh and delicious! After you’ve enjoyed your first slice (or two), be sure to cover the remaining cheesecake tightly with plastic wrap or transfer it to an airtight container. It’ll stay good in the refrigerator for about 4 to 5 days. But let’s be real—this dessert is so tasty, it probably won’t last that long!
If you happen to have leftovers, you can also freeze your cheesecake for longer storage. Just slice it up, wrap each piece tightly in plastic wrap, and then place them in a freezer-safe container. This way, you can enjoy a creamy slice of heaven anytime the craving strikes! It should keep well in the freezer for up to 2 months. When you’re ready to indulge again, simply transfer a slice to the refrigerator to thaw overnight. No need to reheat; it’s best served chilled, just like when you first made it!
So, whether you’re storing for later or sharing with friends, these tips will help you keep that delightful flavor and texture intact. Enjoy your cheesecake journey, and don’t forget to savor every last bite!
Nutritional Information Section
Understanding the nutritional content of your Banana Pudding Cheesecake can help you enjoy it mindfully! Here’s a general breakdown per slice:
- Calories: 350
- Sugar: 22g
- Sodium: 210mg
- Fat: 24g
- Saturated Fat: 14g
- Unsaturated Fat: 8g
- Trans Fat: 0g
- Carbohydrates: 30g
- Fiber: 1g
- Protein: 4g
- Cholesterol: 85mg
Keep in mind that these values can vary based on the specific ingredients and brands you use. If you’re watching your dietary intake, feel free to adjust the recipe to suit your needs. For example, using lower-fat cream cheese or a sugar substitute can help tailor it to your preferences. Enjoy this delicious dessert while being mindful of what works best for you!
What to Do Next
Now that you’ve created this scrumptious Banana Pudding Cheesecake, I’d love to hear about your experience! Did you make any fun tweaks or add your own special touches? Maybe you served it at a gathering and wowed your friends? Please take a moment to leave a comment below and share your thoughts! I’m always excited to hear how things turned out for you.
If you enjoyed this recipe, consider giving it a rating! Your feedback not only helps me improve but also guides others in their cheesecake adventures. And hey, don’t forget to snap a picture of your beautiful creation and share it on social media. Tag me so we can celebrate your baking triumphs together!
Happy baking, and may your cheesecake always be creamy and delicious!
Print
Banana Pudding Cheesecake: 5 Steps to Creamy Bliss
- Prep Time: 30 minutes
- Cook Time: 10 minutes
- Total Time: 4 hours 40 minutes
- Yield: 12 servings 1x
- Category: Dessert
- Method: Baking and Chilling
- Cuisine: American
- Diet: Vegetarian
Description
A creamy and delicious dessert combining banana pudding and cheesecake.
Ingredients
- 1 1/2 cups graham cracker crumbs
- 1/2 cup unsalted butter, melted
- 2 (8 oz) packages cream cheese, softened
- 1 cup sugar
- 1 tsp vanilla extract
- 2 cups heavy whipping cream
- 1 package instant banana pudding mix
- 2 cups milk
- 3 ripe bananas, sliced
Instructions
- Preheat the oven to 325°F (165°C).
- Mix graham cracker crumbs and melted butter.
- Press the mixture into the bottom of a springform pan.
- Bake for 10 minutes, then let cool.
- In a bowl, beat cream cheese, sugar, and vanilla until smooth.
- In another bowl, whisk banana pudding mix with milk until thick.
- Fold the pudding into the cream cheese mixture.
- In a separate bowl, whip heavy cream until stiff peaks form.
- Gently fold whipped cream into the banana mixture.
- Layer sliced bananas on the crust, then pour the cheesecake mixture over.
- Chill in the refrigerator for at least 4 hours.
- Serve chilled and enjoy.
Notes
- Use ripe bananas for better flavor.
- Chill overnight for best results.
- Top with extra whipped cream if desired.
Nutrition
- Serving Size: 1 slice
- Calories: 350
- Sugar: 22g
- Sodium: 210mg
- Fat: 24g
- Saturated Fat: 14g
- Unsaturated Fat: 8g
- Trans Fat: 0g
- Carbohydrates: 30g
- Fiber: 1g
- Protein: 4g
- Cholesterol: 85mg
Keywords: Banana Pudding Cheesecake, Banana Dessert, Cheesecake Recipe