
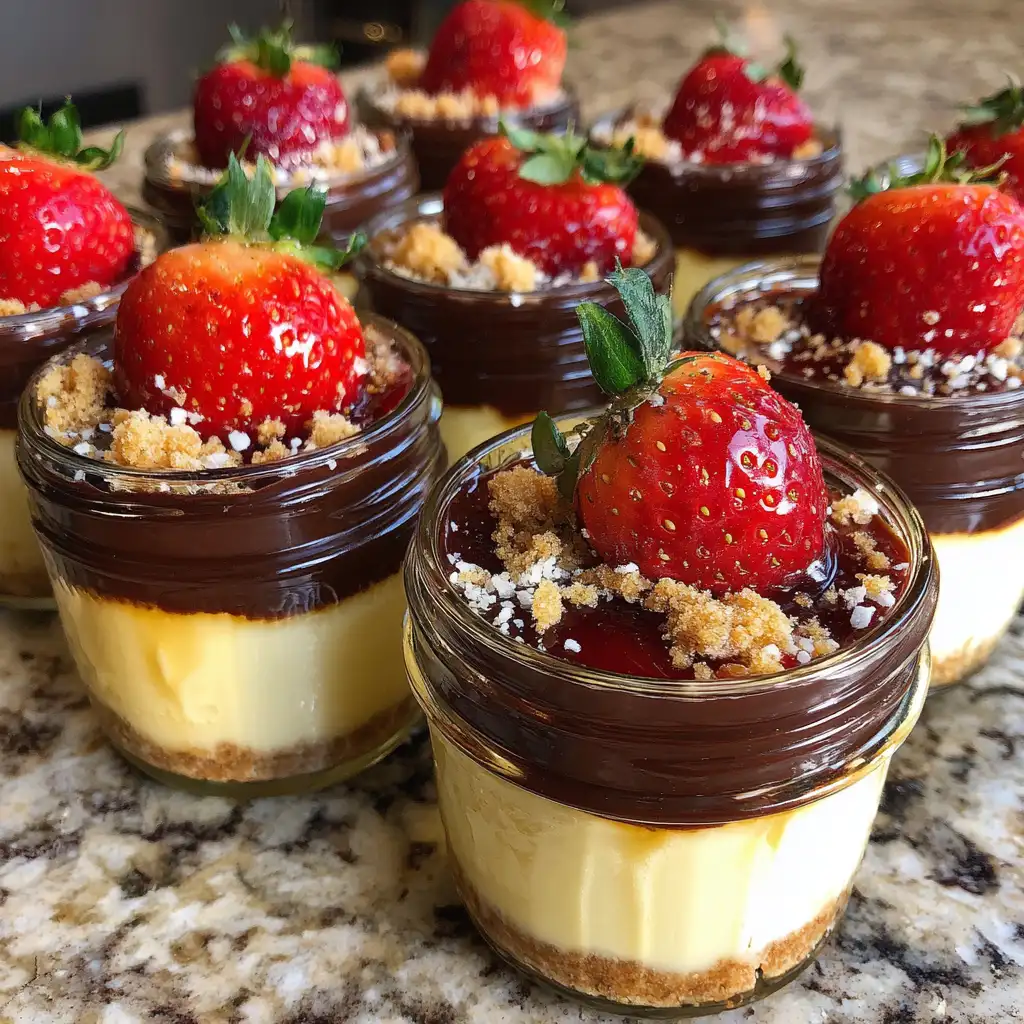
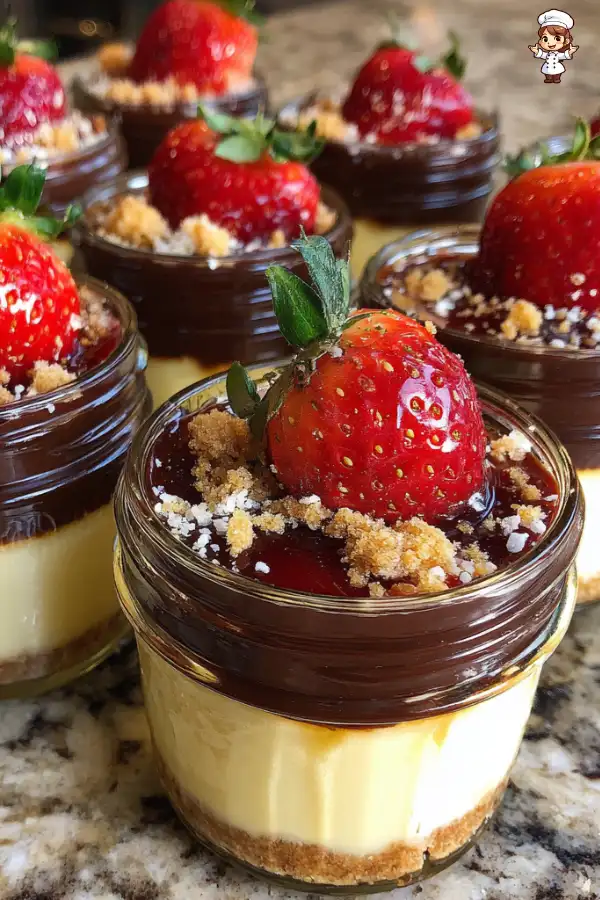
Cheesecake jars are a delightful twist on the classic cheesecake. They offer all the creamy goodness of traditional cheesecake but in a fun, portable format. These jars are perfect for parties, picnics, or even a cozy night in. Each jar is layered with a rich cheesecake filling, a crunchy crust, and your choice of delicious toppings. The best part? You can customize them to suit your taste!
Imagine digging into a jar filled with smooth, creamy cheesecake, topped with fresh fruit or decadent chocolate. It’s a treat that’s not only tasty but also visually appealing. The layers create a beautiful presentation, making them a hit at any gathering. Plus, they’re easy to serve and eat, which adds to their charm.
Whether you’re a cheesecake lover or just looking for a new dessert idea, cheesecake jars are sure to impress. They combine simplicity with elegance, making them a fantastic choice for both novice and experienced bakers. So, let’s dive into the ingredients and steps needed to create these scrumptious cheesecake jars!
Ingredients for Cheesecake Jars Recipe
Essential Ingredients for the Cheesecake Filling
To create the creamy filling for your cheesecake jars, you’ll need a few key ingredients. First, grab 16 ounces (450 grams) of softened cream cheese. This is the star of the show, providing that rich and smooth texture we all love. Next, you’ll need 1/2 cup (100 grams) of granulated sugar to sweeten the mixture. A teaspoon of vanilla extract adds a lovely flavor that enhances the overall taste. Finally, don’t forget 1 cup (240 ml) of heavy cream. Whipping this cream will give your cheesecake a light and airy feel, making each bite delightful.
Ingredients for the Crust Layer
The crust is an essential part of any cheesecake, and for these jars, you’ll need 1/2 cup (50 grams) of crushed graham crackers. These provide a crunchy texture that contrasts beautifully with the creamy filling. You can crush the graham crackers by placing them in a zip-top bag and using a rolling pin or simply pulsing them in a food processor. This simple crust layer adds flavor and structure to your cheesecake jars.
Optional Toppings for Cheesecake Jars
Now, let’s talk about toppings! You have plenty of options to make your cheesecake jars even more delicious. A cup (240 ml) of fresh fruit compote or chocolate ganache works wonderfully as a topping. If you prefer fruity flavors, consider using strawberries, blueberries, or raspberries. These fresh fruits not only taste great but also add a pop of color to your jars. For a more indulgent treat, drizzle some caramel sauce or sprinkle cookie crumbs on top. The possibilities are endless, so feel free to get creative!
Step-by-Step Preparation of Cheesecake Jars Recipe
Step 1: Prepare the Crust for Cheesecake Jars
To start, you need to prepare the crust for your cheesecake jars. Take your 1/2 cup (50 grams) of crushed graham crackers and set them aside. If you haven’t crushed them yet, you can do this easily. Place the graham crackers in a zip-top bag and use a rolling pin to crush them into fine crumbs. Alternatively, you can use a food processor for a quicker method. Once you have your crumbs, you can layer them in the jars later. This crust will add a delightful crunch to your creamy cheesecake filling.
Step 2: Make the Cheesecake Filling
Next, it’s time to make the cheesecake filling. In a large mixing bowl, combine the softened cream cheese and granulated sugar. Using an electric mixer, beat the mixture on medium speed for about 2-3 minutes. You want it to be smooth and creamy. After that, add in the teaspoon of vanilla extract and mix until it’s well blended. Now, in a separate bowl, pour in the 1 cup (240 ml) of heavy cream. Whip it using a hand mixer or stand mixer until stiff peaks form, which should take about 3-5 minutes. This whipped cream will make your cheesecake light and fluffy.
Step 3: Layering the Cheesecake Jars
Now comes the fun part—layering your cheesecake jars! Start by taking your clear glass jars or cups. Begin with a layer of the cheesecake filling, filling each jar about one-third full. Next, add a layer of your chosen topping, either fresh fruit compote or chocolate ganache. This should fill the jar to about two-thirds full. Then, add another layer of the cheesecake filling on top of the compote or ganache, filling the jars almost to the top. Finally, sprinkle a layer of crushed graham crackers on top of each jar. This will give your cheesecake jars a lovely texture and flavor.
Step 4: Chilling the Cheesecake Jars
After you’ve layered your jars, it’s time to chill them. Cover each jar with a lid or plastic wrap. Place them in the refrigerator for at least 2 hours. This chilling time allows the flavors to meld together and helps the cheesecake set properly. If you can wait longer, letting them chill overnight will enhance the flavors even more. Once they’re ready, you can garnish them with fresh fruit for an extra touch of color and flavor. Enjoy your delicious cheesecake jars!
Tips for Perfecting Your Cheesecake Jars Recipe
Common Mistakes to Avoid in Cheesecake Jars Recipe
Making cheesecake jars can be a fun experience, but there are a few common mistakes to watch out for. First, ensure your cream cheese is softened properly. If it’s too cold, it won’t mix well with the sugar, leading to lumps in your filling. Always let it sit at room temperature for about 30 minutes before mixing.
Another mistake is overmixing the whipped cream. When you whip the heavy cream, stop as soon as stiff peaks form. Overwhipping can turn it into butter, which isn’t what you want for a light cheesecake. Gently fold the whipped cream into the cream cheese mixture to keep it airy.
Also, be careful with the layering. If you add too much of the topping, it can overpower the cheesecake filling. Aim for balanced layers to enjoy the flavors together. Lastly, don’t skip the chilling step! This is crucial for the cheesecake to set properly. If you serve them too soon, they may not hold their shape.
Storage Tips for Cheesecake Jars
Storing your cheesecake jars correctly is key to keeping them fresh. After making them, cover each jar tightly with a lid or plastic wrap. They can be stored in the refrigerator for up to 5 days. This makes them a great make-ahead dessert for gatherings or busy weeks.
If you want to keep them longer, you can freeze the jars. Just make sure to leave some space at the top of each jar, as the filling will expand when frozen. Cheesecake jars can last in the freezer for about 2 months. When you’re ready to enjoy them, simply transfer them to the fridge to thaw overnight.
Remember, if you’ve added fresh fruit as a topping, it’s best to add that just before serving. This keeps the fruit fresh and vibrant. With these tips, you’ll be well on your way to creating perfect cheesecake jars every time!
Variation Ideas for Cheesecake Jars Recipe
Flavor Variations for Cheesecake Jars
One of the best things about cheesecake jars is their versatility. You can easily switch up the flavors to suit your mood or the season. For a classic twist, try adding lemon zest or juice to the cheesecake filling. This will give it a refreshing citrus flavor that pairs beautifully with fresh berries.
If you’re a chocolate lover, consider mixing in melted chocolate into the cream cheese filling. Dark, milk, or even white chocolate can create a rich and indulgent dessert. You can also layer in chocolate pudding for an extra chocolatey experience.
For a fun and festive touch, try adding spices like cinnamon or nutmeg. These warm spices can transform your cheesecake jars into a cozy dessert, perfect for fall or winter gatherings. You can also experiment with flavored extracts, such as almond or coconut, to create unique flavor profiles.
Don’t forget about seasonal fruits! In the summer, use peaches or cherries for a fruity burst. In the fall, pumpkin puree can be added to the filling for a delicious pumpkin cheesecake jar. The options are endless, so feel free to get creative!
Healthier Alternatives in Cheesecake Jars Recipe
If you’re looking for a healthier version of cheesecake jars, there are plenty of alternatives to consider. Start by using low-fat cream cheese or Greek yogurt instead of regular cream cheese. This will reduce the fat content while still providing a creamy texture.
For a natural sweetener, try using honey or maple syrup instead of granulated sugar. These options can add a unique flavor while keeping the sweetness. You can also reduce the amount of sweetener by using ripe bananas or applesauce in the filling.
To make the crust healthier, consider using whole grain graham crackers or oats. You can even make a nut-based crust using almonds or walnuts for added nutrition. Just blend the nuts with a bit of coconut oil to form a crust that’s both tasty and nutritious.
Lastly, load up on fresh fruits as toppings. They not only add flavor but also provide vitamins and antioxidants. By making these simple swaps, you can enjoy delicious cheesecake jars that are a bit lighter but still satisfying!
FAQs About Cheesecake Jars Recipe
How long do cheesecake jars last in the fridge?
Cheesecake jars can last in the fridge for up to 5 days when stored properly. Make sure to cover each jar tightly with a lid or plastic wrap. This helps keep them fresh and prevents any odors from the fridge from affecting their taste. If you plan to enjoy them later, it’s best to wait until just before serving to add any fresh fruit toppings.
Can I freeze cheesecake jars?
Yes, you can freeze cheesecake jars! They can last in the freezer for about 2 months. Just remember to leave some space at the top of each jar, as the filling will expand when frozen. When you’re ready to enjoy them, simply transfer the jars to the fridge to thaw overnight. This way, you can have a delicious dessert ready whenever you want!
What can I use instead of cream cheese in cheesecake jars?
If you’re looking for alternatives to cream cheese, there are several options. You can use low-fat cream cheese or Greek yogurt for a lighter version. Silken tofu is another great substitute, providing a creamy texture without dairy. For a nutty flavor, try using cashew cream made from soaked cashews blended with a bit of lemon juice. Each of these alternatives will give your cheesecake jars a unique twist!
How do I make cheesecake jars without gelatin?
Making cheesecake jars without gelatin is easy! The key is to whip the heavy cream until stiff peaks form, which helps the filling set. You can also use mascarpone cheese or a combination of cream cheese and whipped cream to achieve a thick and creamy texture. Just follow the steps in the recipe, and you’ll have delicious cheesecake jars without the need for gelatin!
Print
Cheesecake jars recipe
- Prep Time: 30 minutes
- Cook Time: 0 minutes
- Total Time: 2 hours 30 minutes
- Yield: 4–6 servings 1x
- Category: Dessert
- Method: No-bake
- Cuisine: American
- Diet: Vegetarian
Description
Cheesecake jars are a delightful twist on the classic cheesecake, offering creamy goodness in a portable format, perfect for any occasion.
Ingredients
- 16 ounces (450 grams) of softened cream cheese
- 1/2 cup (100 grams) of granulated sugar
- 1 teaspoon of vanilla extract
- 1 cup (240 ml) of heavy cream
- 1/2 cup (50 grams) of crushed graham crackers
- 1 cup (240 ml) of fresh fruit compote or chocolate ganache (optional)
- Fresh fruits like strawberries, blueberries, or raspberries (optional)
- Caramel sauce or cookie crumbs (optional)
Instructions
- Prepare the crust by crushing graham crackers and setting them aside.
- Make the cheesecake filling by mixing cream cheese and sugar, then adding vanilla extract and whipped cream.
- Layer the cheesecake jars starting with the filling, then adding toppings, followed by more filling, and finishing with crushed graham crackers.
- Chill the jars in the refrigerator for at least 2 hours before serving.
Notes
- Ensure cream cheese is softened for easy mixing.
- Avoid overmixing the whipped cream to maintain its airy texture.
- Balance the layers to enjoy the flavors together.
- Chill the jars properly for the cheesecake to set.
Nutrition
- Serving Size: 1 jar
- Calories: 350
- Sugar: 20g
- Sodium: 150mg
- Fat: 25g
- Saturated Fat: 15g
- Unsaturated Fat: 5g
- Trans Fat: 0g
- Carbohydrates: 30g
- Fiber: 1g
- Protein: 5g
- Cholesterol: 80mg
Keywords: cheesecake jars, dessert, no-bake cheesecake, portable dessert