

There’s something magical about the smell of freshly baked bread wafting through your home. When it comes to comfort food, homemade crescent rolls are a classic favorite. These delightful rolls are soft, buttery, and perfect for any meal. Whether you’re serving them at breakfast, dinner, or a special occasion, they never fail to impress. In this article, we’ll explore the homemade crescent rolls recipe that will have your family and friends asking for seconds!
What Makes Homemade Crescent Rolls Special?
Homemade crescent rolls stand out for several reasons. First, they are made with love and care, which adds a personal touch that store-bought rolls simply can’t match. The process of making them from scratch allows you to control the ingredients, ensuring freshness and quality. Plus, the aroma of baking rolls fills your kitchen with warmth and joy.
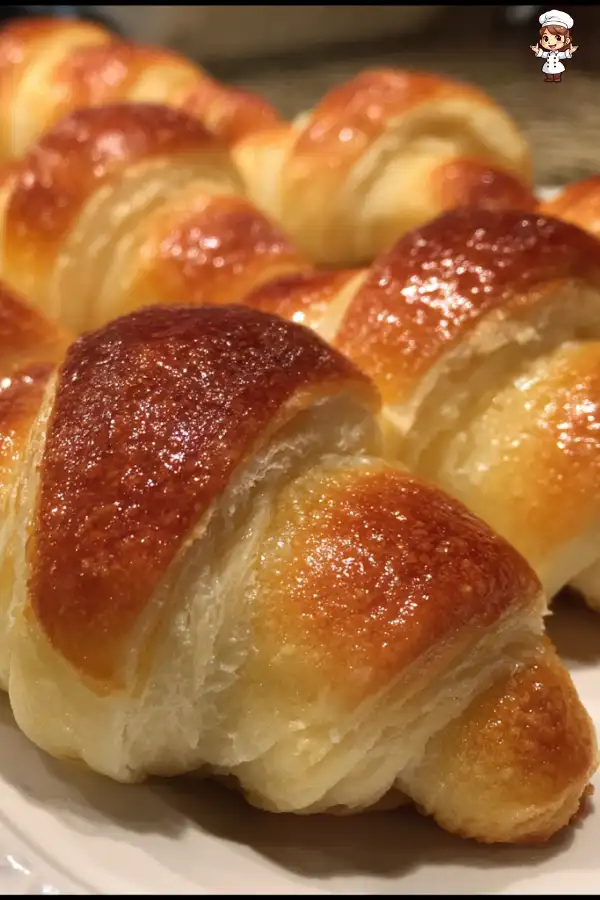
Another reason these rolls are special is their texture. When baked correctly, they are light and fluffy, with a golden-brown crust that is irresistible. The layers created during the rolling process give them a unique shape and delightful flakiness. Each bite is a perfect combination of buttery goodness and soft bread, making them a treat for the senses.
Finally, homemade crescent rolls are versatile. You can enjoy them plain, or you can get creative by adding fillings or toppings. From sweet jams to savory cheeses, the possibilities are endless. This flexibility makes them a fantastic addition to any meal, whether it’s a holiday feast or a casual family dinner.
So, roll up your sleeves and get ready to dive into the world of baking! With this homemade crescent rolls recipe, you’ll create a delicious treat that will surely become a staple in your kitchen.
Ingredients for Homemade Crescent Rolls Recipe
Essential Ingredients for the Perfect Rolls
To create the best homemade crescent rolls, you need a few key ingredients. Each one plays a vital role in achieving that soft, fluffy texture and rich flavor. Here’s what you’ll need:
- All-purpose flour: 4 cups, plus extra for dusting. This is the base of your dough, providing structure.
- Active dry yeast: 2 1/4 teaspoons (1 packet). Yeast is essential for making the rolls rise and become light.
- Sugar: 1/4 cup. Sugar not only sweetens the dough but also helps activate the yeast.
- Salt: 1 teaspoon. Salt enhances the flavor and controls yeast activity.
- Milk: 1 cup (warm, about 110°F or 43°C). Warm milk helps the yeast activate and adds moisture.
- Unsalted butter: 1/2 cup (melted, plus extra for brushing). Butter adds richness and flavor to the rolls.
- Eggs: 2 large (room temperature). Eggs contribute to the dough’s structure and richness.
These ingredients work together to create the perfect dough for your homemade crescent rolls. Each component is important, so make sure to measure accurately for the best results!
Optional Ingredients to Enhance Flavor
While the essential ingredients are crucial, you can also add some optional ingredients to elevate your homemade crescent rolls. Here are a few ideas:
- Herbs: Fresh or dried herbs like rosemary or thyme can be mixed into the dough for a savory twist.
- Cheese: Adding shredded cheese, such as cheddar or mozzarella, can create a delicious cheesy roll.
- Garlic: Incorporating minced garlic into the melted butter for brushing can give your rolls a delightful garlic flavor.
- Sweet fillings: Consider adding chocolate chips, cinnamon sugar, or fruit preserves for a sweet treat.
These optional ingredients allow you to customize your homemade crescent rolls recipe to suit your taste. Feel free to experiment and find your favorite combinations!
Step-by-Step Preparation of Homemade Crescent Rolls Recipe
Step 1: Preparing the Dough
To start your journey to delicious homemade crescent rolls, you need to prepare the dough. Begin by activating the yeast. In a small bowl, mix the warm milk with sugar. Then, sprinkle the active dry yeast on top. Let it sit for about 5-10 minutes. You’ll know it’s ready when it becomes frothy. This means the yeast is alive and ready to work its magic!
Next, grab a large mixing bowl. Combine the all-purpose flour and salt. Make a well in the center of the flour mixture. Pour in the melted butter, eggs, and the frothy yeast mixture. Using a wooden spoon or spatula, stir everything together until a rough dough forms. It might look a bit messy, but that’s okay! It will come together as you knead it.
Step 2: Allowing the Dough to Rise
Now that your dough is mixed, it’s time for it to rise. Transfer the dough to a lightly floured surface. Knead it for about 5-7 minutes. You want it to be smooth and elastic. If it feels too sticky, sprinkle a little more flour as needed. Once you’re happy with the texture, place the kneaded dough in a greased bowl. Cover it with a clean kitchen towel or plastic wrap.
Let the dough rise in a warm place until it doubles in size. This usually takes about 1 to 1.5 hours. You can place it near a warm oven or in a sunny spot. Watching the dough rise is exciting! It’s like magic happening right before your eyes.
Step 3: Shaping the Crescent Rolls
After the dough has risen, it’s time to shape those delightful crescent rolls. Start by punching down the dough gently to release the air. Turn it out onto a floured surface and roll it into a large circle, about 1/4 inch thick. Use a rolling pin for this step to get an even thickness.
Once you have your circle, it’s time to cut it. Use a sharp knife or pizza cutter to slice the circle into 8 equal wedges, just like cutting a pizza. Now comes the fun part! Starting from the wide end of each wedge, roll the dough towards the point. This will create the classic crescent shape. Place each rolled crescent on a baking sheet lined with parchment paper, leaving about 2 inches of space between them.
Step 4: Baking the Rolls to Perfection
With your crescent rolls shaped, it’s time for the second rise. Cover the shaped rolls with a kitchen towel and let them rise again in a warm place for about 30-45 minutes. You’ll notice they puff up nicely during this time.
While the rolls are rising, preheat your oven to 375°F (190°C). This ensures that your rolls will bake evenly. Once the rolls have risen, brush the tops with melted butter. This will give them a beautiful golden finish. Now, it’s time to bake! Place the baking sheet in the preheated oven and bake for 15-20 minutes. They should be golden brown and sound hollow when tapped on the bottom.
Once baked, remove the crescent rolls from the oven and let them cool on a wire rack. You can serve them warm, brushed with additional melted butter if you like. Enjoy the fruits of your labor with family and friends!
Tips for the Best Homemade Crescent Rolls Recipe
Common Mistakes to Avoid
Making homemade crescent rolls can be a delightful experience, but there are a few common mistakes to watch out for. First, ensure your yeast is fresh. If it’s expired, your rolls won’t rise properly. Always check the expiration date on the packet before using it.
Another mistake is not measuring ingredients accurately. Baking is a science, and even a small difference can affect the outcome. Use measuring cups and spoons for precision. Also, avoid adding too much flour while kneading. While it’s tempting to sprinkle more flour to prevent stickiness, too much can lead to dense rolls.
Don’t skip the rising times! Allowing the dough to rise properly is crucial for achieving that light and fluffy texture. If you rush this step, your rolls may turn out flat. Lastly, remember to preheat your oven. Baking in a properly heated oven ensures even cooking and a beautiful golden crust.
How to Achieve Fluffy and Soft Rolls
To achieve the fluffiest and softest homemade crescent rolls, follow these tips. First, use warm milk, not hot. Milk that’s too hot can kill the yeast, preventing your rolls from rising. Aim for a temperature around 110°F (43°C) for the best results.
Next, knead the dough thoroughly. Kneading develops gluten, which gives the rolls their structure. Aim for about 5-7 minutes of kneading until the dough is smooth and elastic. If you have a stand mixer, use the dough hook attachment for an easier process.
Additionally, consider using a warm environment for rising. If your kitchen is cool, you can place the dough in an oven with the light on. This creates a cozy spot for the dough to rise. Lastly, brush the rolls with melted butter right after baking. This adds flavor and keeps them soft. Following these tips will help you create the perfect homemade crescent rolls every time!
Variation of Homemade Crescent Rolls Recipe
Sweet vs. Savory Crescent Rolls
When it comes to homemade crescent rolls, the flavor possibilities are endless! You can easily create both sweet and savory variations to suit your taste buds. For sweet crescent rolls, consider adding ingredients like cinnamon, sugar, or chocolate chips. A sprinkle of cinnamon sugar before baking can transform your rolls into a delightful treat. You can also fill them with fruit preserves or Nutella for a delicious breakfast option.
On the other hand, if you prefer savory flavors, think about incorporating cheese or herbs into your dough. Adding shredded cheese, like cheddar or mozzarella, can create a cheesy delight that pairs perfectly with soups or salads. You can also mix in fresh herbs, such as rosemary or thyme, to give your rolls a fragrant twist. These savory options make your homemade crescent rolls a versatile side dish for any meal!
Gluten-Free Options for Homemade Crescent Rolls
If you or someone in your family has a gluten intolerance, don’t worry! You can still enjoy homemade crescent rolls by using gluten-free flour. Many brands offer gluten-free all-purpose flour blends that work well in baking. Just make sure to check the packaging for any specific instructions, as gluten-free flours may require different ratios of liquid or additional binding agents.
To enhance the texture of your gluten-free crescent rolls, consider adding a tablespoon of xanthan gum. This ingredient helps mimic the elasticity of gluten, resulting in a softer roll. Additionally, you can experiment with adding yogurt or sour cream to the dough for extra moisture. With these adjustments, you can create delicious gluten-free crescent rolls that everyone can enjoy!
FAQs About Homemade Crescent Rolls Recipe
How long do homemade crescent rolls last?
Homemade crescent rolls are best enjoyed fresh, but they can last for a couple of days. When stored in an airtight container at room temperature, they will stay soft for up to 2 days. If you want to keep them longer, consider freezing them. This way, you can enjoy your delicious rolls whenever you like!
Can I freeze homemade crescent rolls?
Absolutely! Freezing homemade crescent rolls is a great way to preserve their freshness. To freeze, allow the rolls to cool completely after baking. Then, place them in a freezer-safe bag or container. They can be stored in the freezer for up to 3 months. When you’re ready to enjoy them, simply thaw them at room temperature or reheat them in the oven for a few minutes.
What can I serve with homemade crescent rolls?
Homemade crescent rolls are incredibly versatile and can be served with a variety of dishes. They pair wonderfully with soups, salads, and stews. You can also serve them alongside your favorite breakfast items, like eggs and bacon. For a sweet treat, enjoy them with butter, jam, or honey. The options are endless, making them a delightful addition to any meal!
How do I reheat homemade crescent rolls?
Reheating homemade crescent rolls is simple! Preheat your oven to 350°F (175°C). Place the rolls on a baking sheet and cover them with aluminum foil to prevent them from drying out. Heat for about 10-15 minutes, or until warmed through. If you prefer, you can also microwave them for about 15-20 seconds, but be careful not to overheat, as this can make them tough.
Print
Homemade crescent rolls recipe
- Prep Time: 30 minutes
- Cook Time: 20 minutes
- Total Time: 1 hour 50 minutes
- Yield: 8 rolls
- Category: Baking
- Method: Baking
- Cuisine: American
- Diet: Vegetarian
Description
A delightful recipe for homemade crescent rolls that are soft, buttery, and perfect for any meal.
Ingredients
- All-purpose flour: 4 cups, plus extra for dusting
- Active dry yeast: 2 1/4 teaspoons (1 packet)
- Sugar: 1/4 cup
- Salt: 1 teaspoon
- Milk: 1 cup (warm, about 110°F or 43°C)
- Unsalted butter: 1/2 cup (melted, plus extra for brushing)
- Eggs: 2 large (room temperature)
Instructions
- Activate the yeast by mixing warm milk with sugar and sprinkling yeast on top. Let it sit for 5-10 minutes until frothy.
- In a large mixing bowl, combine flour and salt. Make a well in the center and add melted butter, eggs, and the yeast mixture. Stir until a rough dough forms.
- Knead the dough on a floured surface for 5-7 minutes until smooth and elastic. Place in a greased bowl, cover, and let rise in a warm place until doubled in size (1 to 1.5 hours).
- Punch down the dough, roll it into a large circle (1/4 inch thick), and cut into 8 wedges.
- Roll each wedge from the wide end to the point to form crescent shapes and place on a baking sheet lined with parchment paper.
- Cover the shaped rolls and let them rise again for 30-45 minutes.
- Preheat the oven to 375°F (190°C). Brush the tops of the rolls with melted butter.
- Bake for 15-20 minutes until golden brown and hollow-sounding when tapped. Let cool on a wire rack.
Notes
- Ensure yeast is fresh for proper rising.
- Measure ingredients accurately for best results.
- Allow proper rising times for light and fluffy texture.
- Preheat the oven for even baking.
Nutrition
- Serving Size: 1 roll
- Calories: 150
- Sugar: 2g
- Sodium: 200mg
- Fat: 6g
- Saturated Fat: 3g
- Unsaturated Fat: 2g
- Trans Fat: 0g
- Carbohydrates: 20g
- Fiber: 1g
- Protein: 3g
- Cholesterol: 30mg
Keywords: crescent rolls, homemade, baking, bread, recipe